

Jascha replied to Alex on Twitter with a good question:
“Is that a new thing? Do you have more detail? I am still connecting cables each time or going through TestFlight 😔”
I was in the same spot until recently. For phones registered with your developer account, you can skip both. A build can install from a link.
iOS has supported this for years. I hadn’t come across it until Alex asked.
Alex was building an iPhone app and got tired of waiting on TestFlight to see one label change. We set this up together in November. Here’s what we built.
The limit
The build only installs on phones listed in your Apple developer account.
That list is the security model. When Xcode signs a development build, it bakes in the IDs (UDIDs) of the phones allowed to run it. A phone that isn’t on the list gets an error, no matter who has the link.
So this works for your own phones and a few people you trust. For a public beta, TestFlight is still the better fit.
You also need a paid developer account and a Mac to build on.
How the link works
iOS supports a special URL scheme for installing apps:
itms-services://?action=download-manifest&url=https://example.com/build/abc123/manifest.plistPut that behind a button on a web page. When you tap it, iOS fetches the manifest, reads where the app file lives, downloads it, and installs it. The icon fills in on your Home Screen.
The manifest is a small plist:
<plist version="1.0"><dict><key>items</key><array><dict>
  <key>assets</key><array><dict>
    <key>kind</key><string>software-package</string>
    <key>url</key><string>https://example.com/build/abc123/App.ipa</string>
  </dict></array>
  <key>metadata</key><dict>
    <key>bundle-identifier</key><string>com.example.myapp</string>
    <key>bundle-version</key><string>0.1</string>
    <key>kind</key><string>software</string>
    <key>title</key><string>My App</string>
  </dict>
</dict></array></dict></plist>
Our page on a phone is one button and a line of instructions:
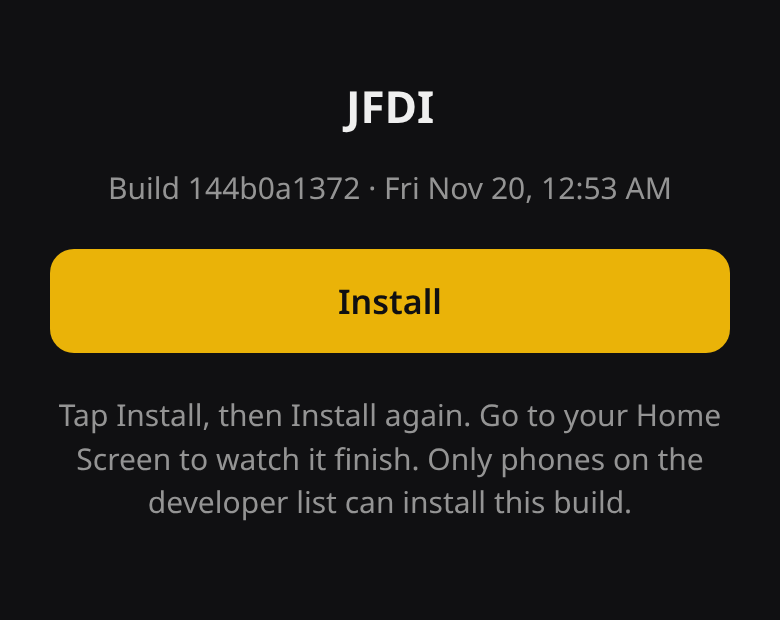
Tap Install and iOS asks to confirm, naming your site and the app:
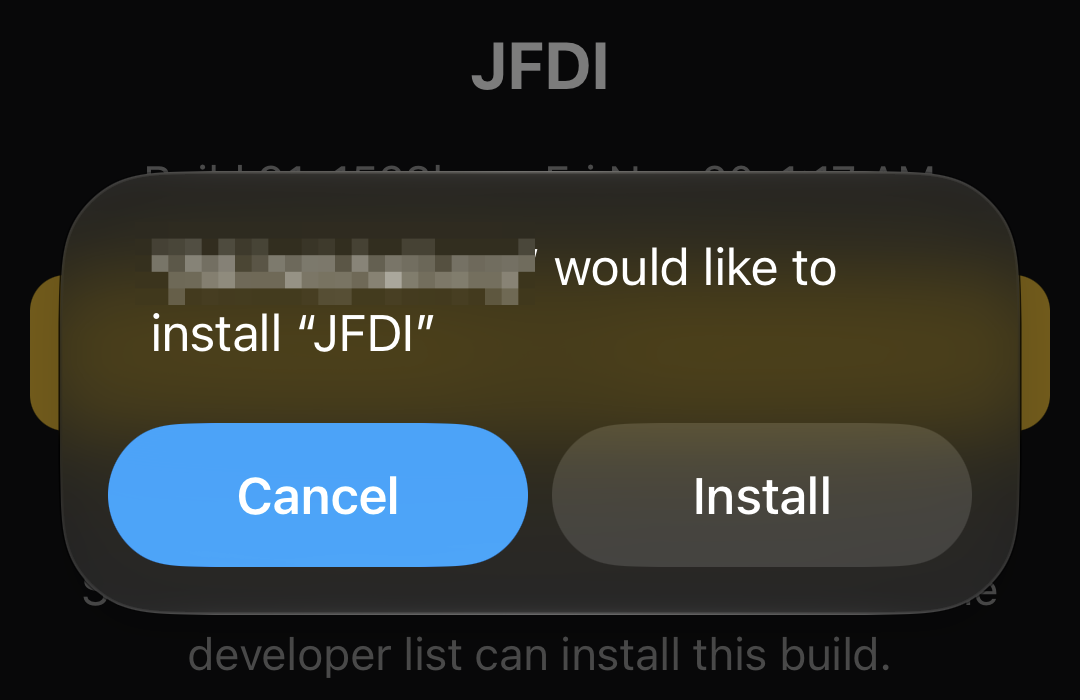
Tap Install again, and the app downloads on your Home Screen.
Three files in a chain: the page, the manifest, the .ipa. All of it has to be HTTPS with a real certificate.
The gotcha: the installer doesn’t bring your login
iOS fetches the manifest and the .ipa outside Safari. No cookies, no session. If your page sits behind a login, the page loads fine and then the download fails, because the installer shows up as a stranger.
The fix is to put the permission in the URL. Every link in the chain is signed and expires after 24 hours. Edit the URL and the signature breaks. After a day, the link stops working.
Alex’s server runs Laravel, which has signed URLs built in, so that’s the main example below. If you’re not on Laravel, there’s a section after it with other ways to do it.
Step 1: export a development-signed .ipa
Archive the app, then export it with the debugging method instead of app-store-connect. (Older Xcode versions call these development and app-store. The old names still work, with a deprecation warning.) That tells Xcode to sign for your registered devices.
The export options file:
<plist version="1.0"><dict>
  <key>method</key><string>debugging</string>
  <key>teamID</key><string>YOUR_TEAM_ID</string>
  <key>signingStyle</key><string>automatic</string>
</dict></plist>
Then:
xcodebuild -scheme MyApp -configuration Release \
  -destination generic/platform=iOS \
  -archivePath build/MyApp.xcarchive -allowProvisioningUpdates archive

xcodebuild -exportArchive -archivePath build/MyApp.xcarchive \
  -exportOptionsPlist DevExportOptions.plist -exportPath build/export
Out comes an .ipa.
Alex’s Mac is a Mac Mini on his network. A script runs those commands over SSH and copies the .ipa to his server. A laptop works too.
Step 2: serve it behind signed links (our Laravel setup)
Three routes, all behind Laravel’s signed middleware:
Route::middleware('signed')->prefix('build/{id}')->name('build.')->group(function () {
    Route::get('/', [BuildController::class, 'page'])->name('page');
    Route::get('/manifest.plist', [BuildController::class, 'manifest'])->name('manifest');
    Route::get('/App.ipa', [BuildController::class, 'ipa'])->name('ipa');
});
The page builds the Install button. The manifest link it hands to iOS is signed too, with the same expiry as the page:
$manifest = URL::temporarySignedRoute('build.manifest', $expires, ['id' => $id]);
$install = 'itms-services://?action=download-manifest&url=' . rawurlencode($manifest);
The manifest does the same for the .ipa URL inside it. Each step signs the next one.
A few small choices that have worked for us:
- Give each build a random ID, never “latest.” A link for one build can’t open another.
- Keep the last five builds and delete the rest. Old links die with their files.
- Send
Cache-Control: no-storeso nothing serves a stale build.
Why we kept it on our own server
We could have used one of the simpler options below. Running it inside the Laravel app Alex already had made a few things easier:
- Signing comes built in. Laravel ships signed, expiring URLs and a middleware that checks them.
- It’s one more route in an app that already runs. Hosting, HTTPS and deploys were already handled. Adding the builds took a controller and three routes.
- Rate limiting came free. The same middleware stack caps each link at 30 requests a minute.
- Cleanup is part of the command. Storing a build deletes everything older than the last five, so old links stop working on their own.
- It plugs into the rest of the system. When a new phone sends its UDID, the app posts it to the Discord thread that asked for it. I pick it up there, register the phone and send a fresh link.
That last one decided it. The install link is one piece of a workflow Alex and I already share, so it lives in the same place.
Not on Laravel? Three other ways
Every URL iOS fetches has to work without a login. Here are three ways to do that on other setups, from simplest to most careful.
Option 1: a hard-to-guess folder on any static host
Put the page, the manifest and the .ipa in a folder with a long random name, like /builds/k3f9x2.../. Any static host with HTTPS works.
This is the quickest setup. The trade-off is that the link never expires, so anyone who gets it can download the .ipa. Their phone still has to be on your list to install it. For a solo project, that may be enough.
Option 2: presigned links from object storage
S3, Cloudflare R2 and Google Cloud Storage can all make presigned URLs that expire. You do it in order, inside out:
- Upload the .ipa and make a presigned URL for it.
- Write the manifest with that URL inside, upload it, and presign it.
- Build the
itms-services://link from the manifest URL. Put it on a small HTML page, upload that, and presign it too.
On S3, presigned URLs last seven days at most, so you’ll make fresh ones for each build.
One gotcha with this route: presigned URLs are full of & characters. In the manifest, write each & as &, since it’s XML. In the install link, URL-encode the whole manifest URL. Miss either one and the install is likely to fail.
Option 3: sign the URLs yourself
On any small server, signing takes a few lines. Here it is in Node:
import crypto from "node:crypto";
const SECRET = process.env.BUILD_LINK_SECRET;

function sign(path, hours = 24) {
  const expires = Math.floor(Date.now() / 1000) + hours * 3600;
  const sig = crypto.createHmac("sha256", SECRET).update(`${path}?expires=${expires}`).digest("hex");
  return `${path}?expires=${expires}&signature=${sig}`;
}

function isValid(path, expires, signature) {
  if (Number(expires) < Date.now() / 1000) return false;
  const want = crypto.createHmac("sha256", SECRET).update(`${path}?expires=${expires}`).digest("hex");
  return want.length === signature.length && crypto.timingSafeEqual(Buffer.from(want), Buffer.from(signature));
}
Your page handler calls sign() for the manifest URL. Your manifest handler calls it for the .ipa URL. All three handlers check isValid() before they respond. It’s the same pattern as the Laravel setup, written by hand.
Step 3: make it one command
The whole thing is one command now. Build on the Mac, copy the .ipa up, store it, print a link good for 24 hours.
In practice, Alex asks me for a build in Discord and I post the link when it’s ready.
Adding a new phone
This part is still clunky.
Apple only installs the build on phones listed in your developer account. To list a phone, you need its UDID, and iOS doesn’t show it anywhere in Settings. The usual way to get it is plugging the phone into a Mac. We wanted the other person to be able to do it from wherever they are.
Step 1: get the phone to send its UDID
iOS has an old feature for this called a Profile Service configuration profile. It asks the phone for a few details and sends them to a URL you choose. If it’s still listed in Settings afterward, you can remove it.
The profile is a plist. Ours looks roughly like this:
<plist version="1.0"><dict>
<key>PayloadContent</key><dict>
<key>URL</key><string>https://example.com/udid/abc123/done?expires=...&signature=...</string>
<key>DeviceAttributes</key><array>
<string>UDID</string><string>PRODUCT</string>
<string>VERSION</string><string>DEVICE_NAME</string>
</array>
</dict>
<key>PayloadType</key><string>Profile Service</string>
<key>PayloadDisplayName</key><string>My App: send iPhone ID</string>
<key>PayloadIdentifier</key><string>com.example.myapp.udid</string>
<key>PayloadUUID</key><string>ANY-FIXED-UUID</string>
<key>PayloadVersion</key><integer>1</integer>
</dict></plist>Serve it with the content type application/x-apple-aspen-config, or iOS won’t treat it as a profile.
The URL inside is where the phone posts its answer. The phone posts without a login, so we sign that URL and give it an expiry like the others.
Step 2: what the other person does
We send them a link to a small page with one button:
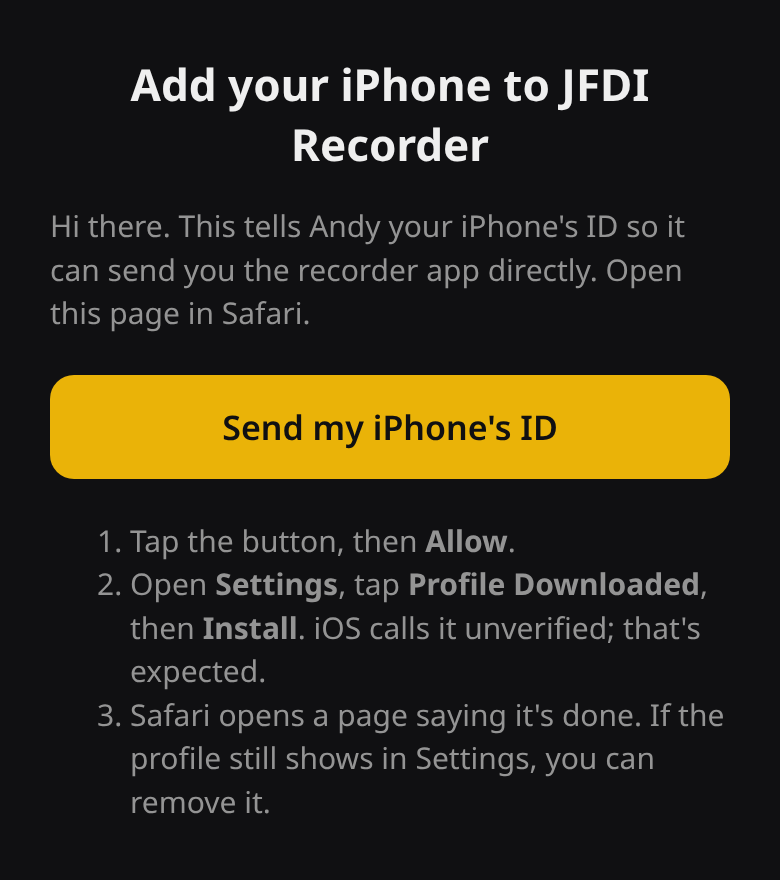
From their side, it goes like this:
- Open the link in Safari. That’s the path we’ve tested, so it’s what we ask people to use.
- Tap the button, then Allow when iOS asks about downloading a profile.
- Open Settings. There’s a Profile Downloaded row near the top. Tap it, then Install.
- iOS labels the profile “unverified” unless you sign it with a certificate. That’s expected for this kind of profile. Ours isn’t signed.
- iOS sends the details to your URL, and Safari opens whatever page you redirect to. We show a short “Got it” page.
Step 3: catch the answer on your server
The phone posts a signed blob (PKCS7) with a plist inside. The XML sits in plain text inside the blob, so we pull the UDID value out with a pattern match and check that it looks like a UDID.
Two details to get right:
- Reply with a 301 redirect. Our server sends one to a “Got it” page. Apple’s docs don’t cover this, but developers report that a plain 200 makes iOS show the install as failed, even after the UDID arrived.
- Save the device name and model too. “iPhone15,3 named Sam’s iPhone” is easier to recognize later than a long hex string.
Our server then posts the UDID to the Discord thread that asked for it, which is how I find out a phone is waiting.
Step 4: register the phone with Apple
You have two ways to do this:
- By hand: in your Apple developer account, go to Certificates, Identifiers & Profiles, then Devices, and add the UDID with a name.
- By API: the App Store Connect API has a
POST /v1/devicescall that takes a name, the platform and the UDID. That lets a script handle registration.
Apple caps you at 100 iPhones per membership year. You can’t delete a phone mid-year, only disable it, and that doesn’t free up its slot. You get a chance to clear out old ones when your membership renews. Name each one clearly.
Step 5: rebuild and send a fresh link
The phone isn’t covered until the build is signed again. With automatic signing and -allowProvisioningUpdates, Xcode regenerates the development profile with the new phone on it during the next archive.
Then send them the install link like normal.
A couple of things that can still go wrong:
- “This provisioning profile cannot be installed on this device” usually means Xcode used an old cached profile that doesn’t list the new phone. Delete the cached team profiles under
~/Library/Developer/Xcode/UserData/Provisioning Profileson the build Mac and build again. - Developer Mode. Our builds are development-signed. On recent iOS versions, a phone may need Developer Mode turned on before a development-signed app will open. If iOS asks, it’s in Settings, then Privacy & Security, then Developer Mode, and the phone restarts once.
Which one to use when
TestFlight: anyone outside your circle. Slower, and outside testers wait on a beta review, but it scales to thousands.
Cable or Wi-Fi from Xcode: fastest when the phone is next to the Mac.
The signed link: instant, works from anywhere, no review. Limited to registered phones, and the signing certificate expires after a year, so you’ll re-sign eventually.
For Alex, the link has become the everyday path. TestFlight is for when something is ready to share.
What I took away
Most of this is setup. The part I’d flag is the login gotcha.
The installer doesn’t act like the browser. Putting the permission in the link, with an expiry, is what makes it work.
If you try this and hit something I didn’t, I’d like to hear about it.